Water damage restoration is the professional process of cleaning, drying, repairing, and restoring a property after water intrusion caused by leaks, flooding, burst pipes, or appliance failures. It goes far beyond removing visible water—it focuses on eliminating hidden moisture, preventing mold growth, and restoring structural safety so the property can be safely occupied again.
Speed is critical after water damage occurs. Water can quickly seep into walls, floors, and structural materials, creating the perfect environment for mold and bacteria. According to the U.S. Environmental Protection Agency (EPA), mold can begin growing within 24–48 hours if moisture is not properly addressed, significantly increasing health risks and repair costs.
The water damage restoration process follows a structured, step-by-step approach to minimize damage and prevent long-term issues. Homeowners can expect an initial assessment, rapid water extraction, moisture detection, controlled drying, cleaning and sanitizing, and repairs if needed. Understanding these steps helps set realistic expectations and highlights why professional restoration is essential after any water-related incident.
Step 1: Emergency Contact & Initial Assessment
The water damage restoration process begins with immediate emergency contact. Most professional restoration services operate 24/7, because water damage doesn’t wait for business hours. The sooner a response team is dispatched, the more damage can be prevented—especially when water is actively spreading or soaking into structural materials.
Once on-site, technicians carry out a thorough inspection of all affected areas. This includes visible damage as well as hidden spaces such as behind walls, under flooring, and inside cabinets. Advanced tools like moisture meters and thermal imaging cameras are often used to detect moisture that isn’t visible to the naked eye.
During this assessment, professionals also identify the source and category of water damage. Determining whether the water is clean (Category 1), contaminated (Category 2), or hazardous (Category 3) is critical, as it directly impacts safety procedures, drying methods, and cleaning requirements. Accurately identifying the cause and severity at this stage ensures the rest of the restoration process is handled correctly, safely, and efficiently.
Step 2: Water Removal & Extraction
Once the initial assessment is complete, the next critical step is water removal and extraction. Standing water must be removed as quickly as possible to prevent it from spreading further into walls, floors, and structural materials. The longer water remains, the more damage it can cause to building materials and personal belongings.
Professional restoration teams use high-powered pumps and industrial-grade wet vacuums designed to handle large volumes of water efficiently. These tools are far more effective than household equipment and allow technicians to extract water from carpets, padding, subfloors, and hard-to-reach areas where moisture can easily linger.
Fast and thorough extraction helps limit further saturation, reduces drying time, and minimizes the risk of secondary issues such as mold growth, warping, and material deterioration. By removing excess water early in the restoration process, this step sets the foundation for effective drying, cleaning, and full recovery of the affected space.
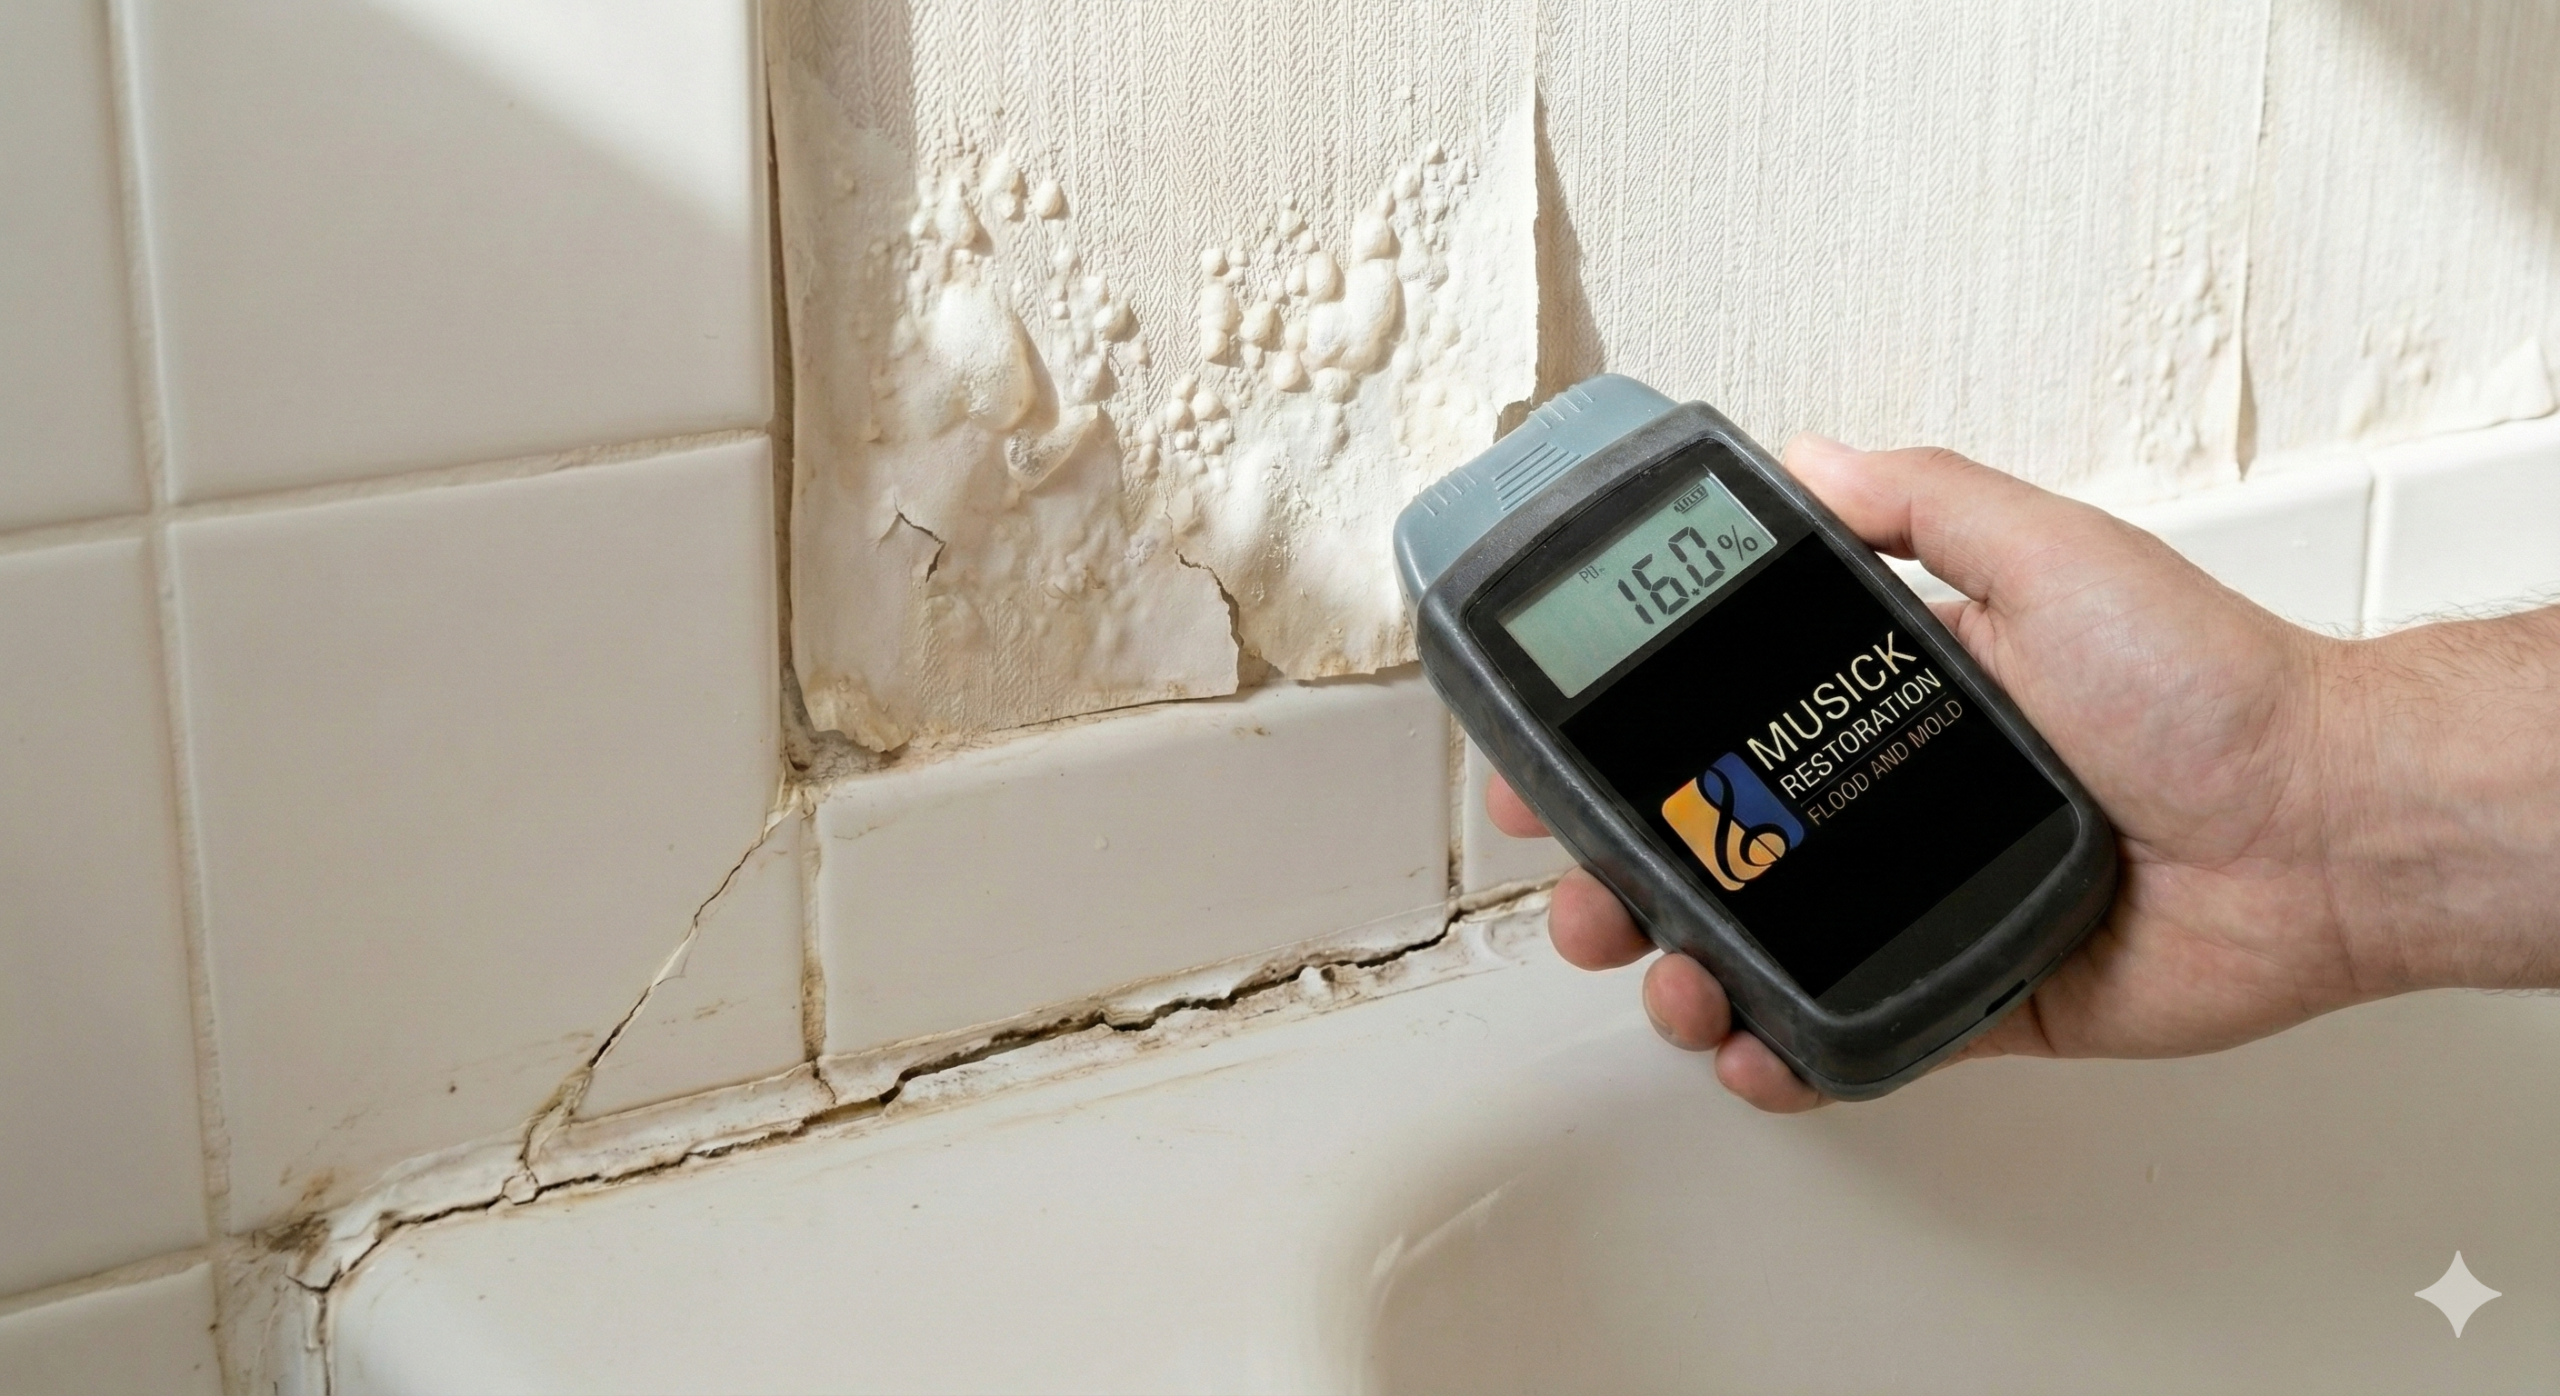
Step 3: Moisture Detection & Mapping
After visible water has been removed, the focus shifts to locating hidden moisture that may be trapped behind walls, under floors, or inside structural materials. This step is critical because unseen moisture can continue causing damage long after the surface appears dry.
Restoration professionals use specialised tools such as moisture meters, hygrometers, and thermal imaging cameras to accurately detect damp areas that are not visible to the eye. These tools help create a clear moisture map of the property, showing exactly where drying is still needed and preventing guesswork.
Proper moisture detection and mapping play a key role in preventing future mold growth. By identifying and addressing every damp area early, this step ensures that no residual moisture is left behind to create conditions for mold, odors, or structural deterioration.
Step 4: Structural Drying & Dehumidification
Once all visible and hidden moisture has been identified, the restoration process moves into structural drying and dehumidification. This step is essential to remove moisture absorbed deep within walls, floors, ceilings, and framing materials—areas that cannot dry naturally on their own.
Professional teams use high-powered air movers and industrial dehumidifiers to create controlled airflow and reduce humidity levels. Air movers help evaporate trapped moisture from surfaces and structural materials, while dehumidifiers pull excess moisture from the air to prevent reabsorption. Together, these tools ensure faster, more thorough drying than standard household equipment.
Throughout the drying phase, moisture levels are monitored daily using moisture meters and humidity sensors. Equipment placement and settings are adjusted as needed to maintain optimal drying conditions. This ongoing monitoring ensures materials reach safe moisture levels, helping prevent mold growth, warping, rot, and long-term structural damage before the restoration process moves forward.
Step 5: Cleaning, Sanitizing & Odor Removal
After the property has been thoroughly dried, the next step is cleaning, sanitizing, and removing odors. Water damage can leave behind dirt, bacteria, and contaminants, especially if the water was from a contaminated source such as a sewer backup or flood.
Cleaning affected surfaces and belongings involves removing dirt, debris, and any residual water deposits from floors, walls, furniture, and personal items. Porous items like carpets, rugs, and fabrics may require professional cleaning or, in some cases, safe disposal if they cannot be fully restored.
Sanitization is crucial to prevent the growth of bacteria, viruses, and mold spores. Restoration professionals use industry-approved disinfectants to ensure surfaces are safe and hygienic.
Odor removal and air purification are the final components of this step. Water damage often leaves lingering musty or unpleasant smells. Specialized air scrubbers, ozone treatments, and deodorizing agents are used to neutralize odors and restore clean indoor air quality.
By completing this step, the property is not only dry and safe, but also clean, hygienic, and free from harmful contaminants, preparing it for any necessary repairs or reconstruction.
Step 6: Mold Prevention & Remediation (If Needed)
Even after water has been removed and the property dried, mold can still develop if moisture lingers in hidden areas. This step focuses on preventing mold growth and safely removing any existing mold before it spreads further.
Addressing Mold Caused by Prolonged Moisture
If water damage went unnoticed for several hours or days, mold may have already begun to grow on walls, floors, insulation, or furniture. Professionals inspect all affected areas to identify any visible or hidden mold, paying special attention to damp, dark, and poorly ventilated spaces.
Safe Containment and Removal Methods
Certified technicians use containment procedures to prevent spores from spreading to unaffected areas. They remove contaminated materials safely and clean affected surfaces using HEPA-filter vacuums and antimicrobial treatments, ensuring that mold is eliminated without risking further contamination.
Preventing Regrowth
After remediation, the team ensures that all surfaces are completely dry and treated with anti-microbial solutions where needed. Proper ventilation, moisture control, and follow-up inspections help prevent mold from returning, keeping your home safe and healthy long-term.
Step 7: Repairs, Reconstruction & Restoration
The final step in the water damage restoration process is repairs, reconstruction, and full restoration of your property. Once all water has been removed, hidden moisture has been addressed, and surfaces are thoroughly cleaned and sanitized, damaged structural materials can be repaired or replaced to restore your home to its pre-loss condition.
Repairing Drywall, Flooring, and Structural Elements
Technicians replace damaged drywall, flooring, and framing as needed. This ensures the structural integrity of your home is fully restored and that it meets building codes and safety standards.
Rebuilding Damaged Areas
Any areas that were removed during water extraction or mold remediation are rebuilt carefully. This can include installing new insulation, cabinetry, doors, or trim, depending on the extent of damage. The goal is to return the property to its original appearance and functionality.
Restoring the Property to Pre-Loss Condition
The restoration process also includes final touches, such as painting, finishing floors, and ensuring that all systems affected by the damage (electrical, plumbing, HVAC) are fully operational. By completing this step, homeowners can confidently return to a safe, dry, and fully restored living space, knowing that the property has been professionally cared for from start to finish.
What Impacts the Water Damage Restoration Timeline?
The time required to complete a water damage restoration project depends on several key factors, each influencing how quickly professionals can fully restore a property.
Severity of Damage
The more extensive the water intrusion, the longer it takes to remove moisture, dry affected areas, and repair damage. Minor leaks may only require a few hours of work, while major flooding or structural water damage can take days or even weeks to address thoroughly.
Size of the Affected Area
Larger properties or multiple rooms impacted by water naturally require more time for assessment, extraction, drying, and restoration. Each space may have different drying needs depending on materials and water exposure.
Type of Water Involved
Not all water damage is the same. Clean water from a pipe leak is generally easier and safer to remove, while contaminated or grey water (from appliances) or hazardous black water (from sewage or flooding) requires additional precautions, sanitation, and sometimes material disposal, which can extend the restoration timeline.
Materials Affected
Different building materials absorb and release water at different rates. Porous materials like drywall, insulation, and carpets take longer to dry and may need partial replacement, whereas non-porous materials like tile, metal, or concrete dry faster. Wood framing and subflooring also require careful monitoring to prevent mold or warping.
By understanding these factors, homeowners can set realistic expectations for how long the restoration process may take and appreciate the careful, step-by-step approach professionals use to ensure a complete and safe recovery.
When Should You Call a Professional?
While minor water spills or small leaks can sometimes be handled with DIY methods, there are several situations where calling a professional water damage restoration team is essential.
Flooding or Large Leaks
If water has inundated multiple rooms, affected structural materials, or comes from a major source like a burst pipe or storm flooding, professional extraction and drying are necessary. Experts have the equipment and experience to remove large volumes of water efficiently and prevent further damage.
Hidden or Recurring Moisture
Water can seep into walls, ceilings, subfloors, or crawlspaces without being immediately visible. Recurring dampness, condensation, or signs of previous leaks indicate that hidden moisture may exist. Professionals use moisture meters, thermal imaging, and other specialized tools to locate and address these areas, ensuring no residual moisture remains to cause mold growth.
Health or Safety Concerns
Contaminated water from sewage, floodwater, or grey water poses health risks due to bacteria, chemicals, and pathogens. Additionally, prolonged water exposure can compromise structural integrity, creating hazards like weakened floors or walls. Professional teams follow safety protocols and certified remediation methods to protect both residents and property.
By calling a professional in these situations, homeowners ensure that the water is removed quickly, thoroughly, and safely, minimizing damage, reducing the risk of mold, and safeguarding their home and health.
Conclusion
Water damage restoration is a critical process that requires speed, precision, and expertise. From the initial emergency assessment to water extraction, moisture detection, structural drying, cleaning, and final repairs, each step plays a vital role in preventing further damage, mold growth, and long-term structural issues.
Acting quickly after water intrusion can save you significant time, money, and stress. Even small leaks can escalate into costly repairs if left untreated, so addressing water damage immediately is essential. By following the proper steps—or calling professional restoration experts—you can protect your property, maintain a safe living environment, and restore your home to its pre-loss condition efficiently and effectively.