Water damage can escalate quickly and silently, turning a small leak or spill into a major restoration project if not handled promptly. Once water enters your home—from a burst pipe, storm flood, or appliance leak—moisture begins absorbing into flooring, drywall, and structural materials almost immediately, setting the stage for deeper damage. Hidden water left untreated invites mold growth and structural issues that are more costly and difficult to fix over time.
Acting fast after water damage is crucial to reduce repair costs, protect your home’s integrity, and safeguard your family’s health. In fact, mold can begin growing in as little as 24 to 48 hours after water exposure if conditions remain wet, making early action essential to prevent infestations and indoor air quality problems.
This guide walks you through the most important steps to take right away—from ensuring safety and stopping the water source to documenting damage and starting the drying process—so you can limit damage and begin the recovery process with confidence.
Step 1: Ensure Safety First
Before addressing any visible water damage, your top priority should be safety. Water and electricity are a dangerous combination, so if water has reached outlets, appliances, or electrical panels, shut off power to the affected areas immediately. If you’re unsure or can’t safely access the breaker, avoid the area and wait for a professional.
Do not stand in pooled water, especially near electrical sources or submerged appliances, as this can lead to serious injury. Even shallow water can conduct electricity and pose a hidden risk. Wear protective footwear if you must move through damp areas, and keep children and pets away from affected rooms.
Finally, watch closely for structural hazards caused by water saturation. Sagging ceilings, warped floors, swollen walls, or cracked drywall can indicate weakened structural materials that may collapse without warning. If you notice any of these signs, evacuate the area and seek professional help before attempting any cleanup.
Step 2: Stop the Source of Water
Once safety is ensured, the next crucial step is to stop the flow of water to prevent further damage. If the water damage is caused by a plumbing issue, locate and shut off the main water supply immediately. For appliance leaks or small pipe bursts, turn off valves connected to the affected appliance or fixture.
If it’s safe to do so, temporarily patch leaks using plumbing tape, a bucket to catch drips, or other quick fixes. These measures won’t replace professional repairs, but they can significantly reduce ongoing water intrusion until help arrives.
At the same time, move valuables and important items—furniture, electronics, documents, and sentimental possessions—away from areas with active water exposure. Elevating items or placing them in dry areas can help prevent permanent damage and save time and money during restoration.
Stopping the source quickly can dramatically reduce the severity of damage and make the next steps—like drying and cleanup—more effective.
Step 3: Document the Damage
Before you start cleaning or removing any materials, it’s important to document the water damage thoroughly. Take clear photos and videos of every affected area, including floors, walls, ceilings, furniture, and personal items. Capture both wide shots and close-ups to show the extent of the damage.
Next, make a detailed inventory of damaged belongings, noting the item, its condition, and estimated value. This list will be essential for insurance purposes and can help speed up your claim process.
Proper documentation provides evidence of the damage before any cleanup or restoration begins. Most insurance companies require photos and records to approve claims, so taking the time to document everything now can save you time, stress, and potential out-of-pocket costs later.
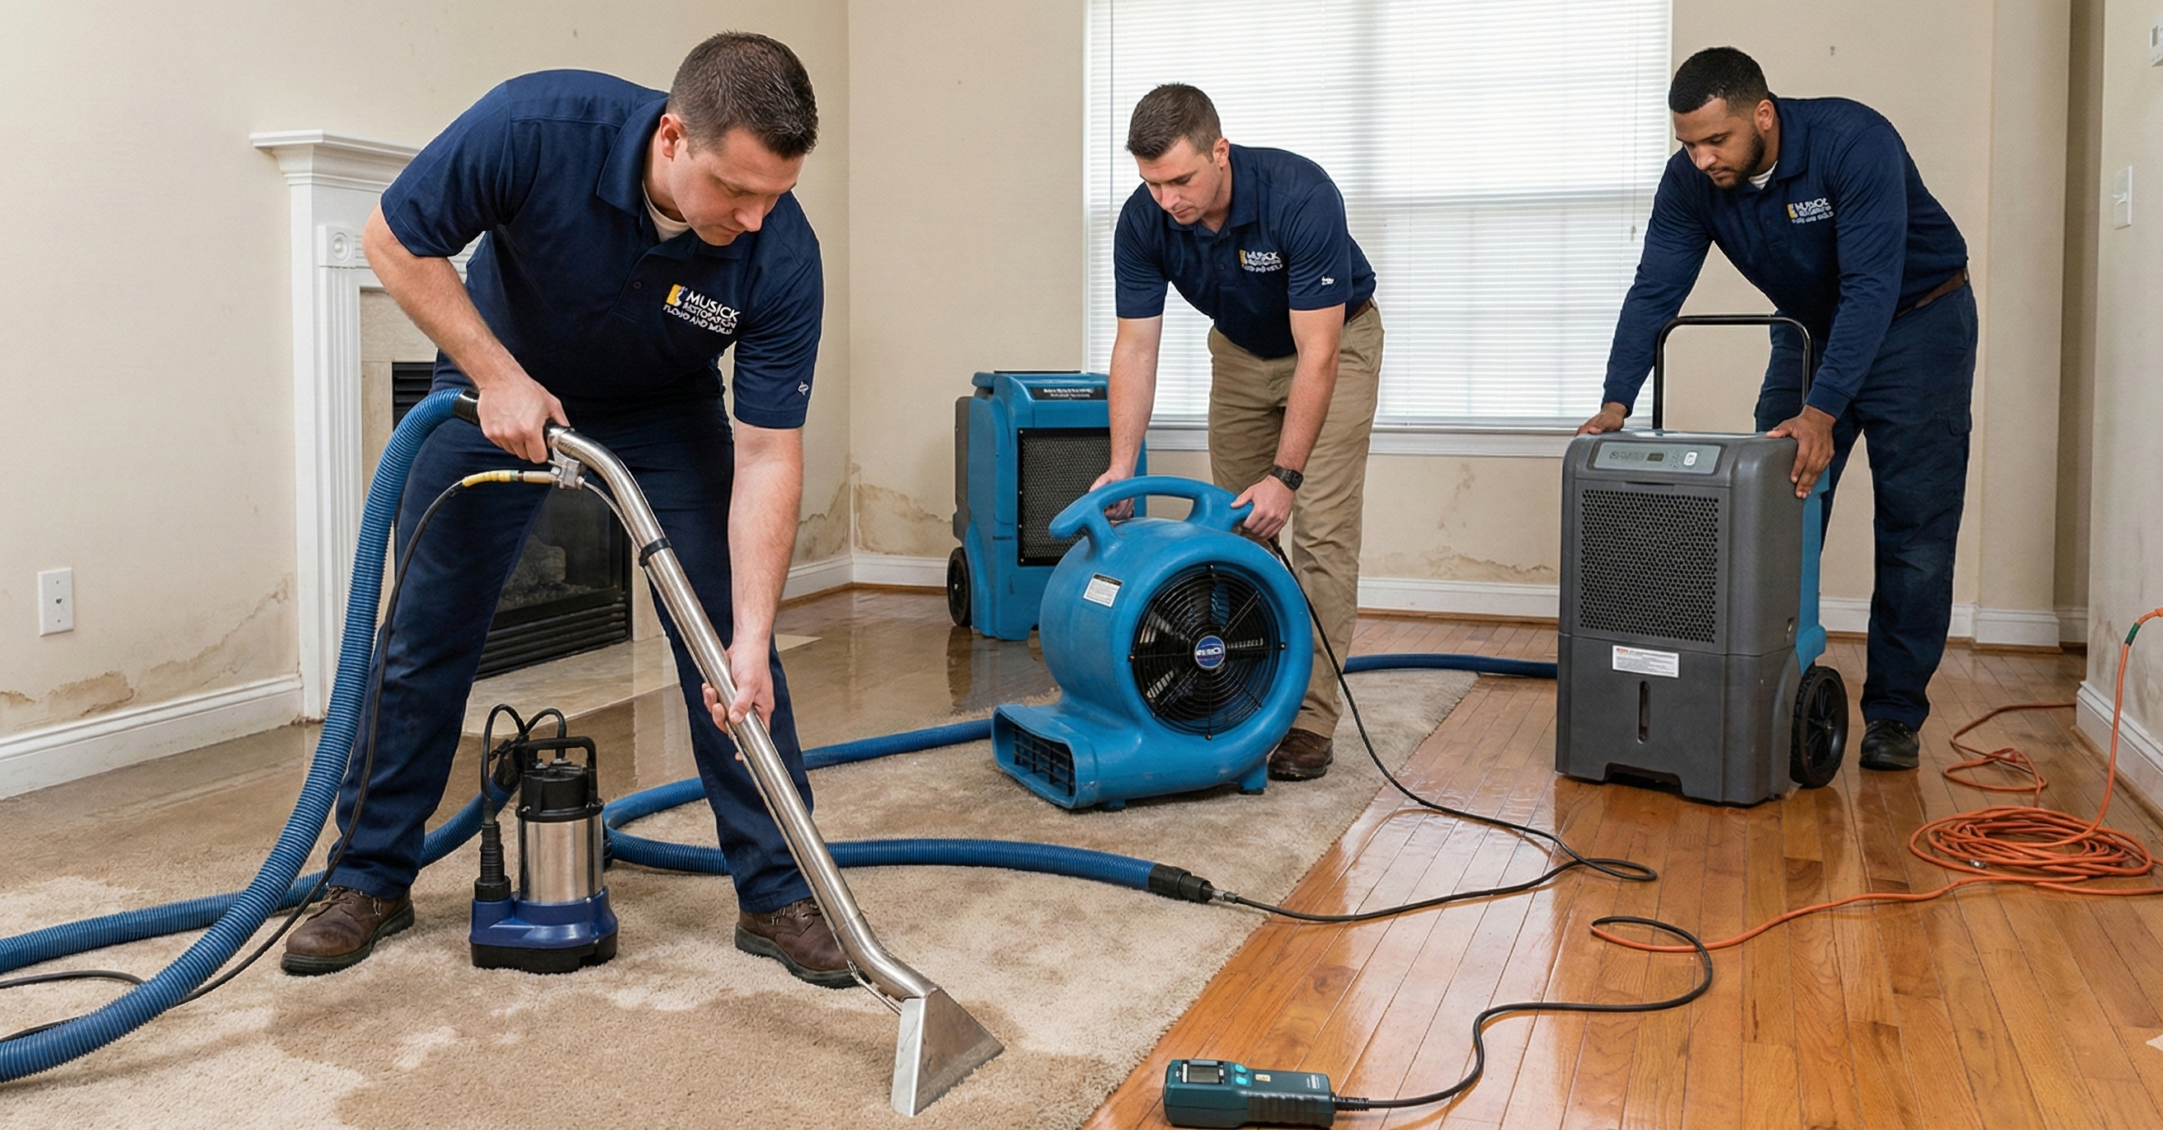
Step 4: Remove Standing Water
After documenting the damage, it’s important to remove any standing water as quickly as possible to prevent further structural issues and mold growth. For small amounts of water, you can use towels, mops, or a wet/dry vacuum to soak up the moisture. Work methodically, starting from the edges of the room and moving toward drains or exits.
Avoid using standard household vacuums, as they are not designed to handle large volumes of water and can be dangerous if water reaches electrical components. For larger floods, extensive leaks, or water that has soaked into floors, walls, or ceilings, it’s best to call a professional water damage restoration team.
Professionals use high-powered pumps and extraction equipment that can remove water quickly and safely, preventing hidden moisture from causing long-term damage and mold growth. Acting fast at this stage is critical to protect your property and reduce overall repair costs.
Step 5: Dry the Area Thoroughly
Once standing water is removed, the next crucial step is to thoroughly dry your property to prevent mold growth and structural damage. Start by opening windows and doors if the weather permits, allowing fresh air to circulate and speed up evaporation.
Use fans, air movers, and dehumidifiers to help remove moisture from floors, walls, and furniture. Pay special attention to hidden areas such as behind walls, under flooring, and inside cabinets, where moisture can linger and create ideal conditions for mold.
For larger or severe water damage, professional drying equipment may be necessary. Experts can monitor humidity levels with moisture meters and thermal imaging to ensure all affected areas are completely dry. Proper drying at this stage is critical—moisture left behind can lead to mold growth within 24–48 hours.
Step 6: Prevent Mold Growth
After drying the affected areas, it’s crucial to take steps to prevent mold from developing, as mold can begin growing in just 24–48 hours on wet or damp surfaces.
Start by removing wet, porous materials such as carpets, padding, insulation, and upholstered furniture that cannot be fully dried. These materials can trap moisture and create ideal conditions for mold spores to thrive.
Next, clean and disinfect all affected surfaces using appropriate cleaning solutions or mold-safe disinfectants. Focus on areas that were in direct contact with water, including floors, walls, baseboards, and cabinetry.
By addressing moisture immediately and thoroughly cleaning the area, you significantly reduce the risk of mold infestations, protecting both your property and your family’s health.
Step 7: Contact a Water Damage Restoration Professional
While minor water incidents can sometimes be managed on your own, professional help is critical when water has affected large areas, soaked into walls or flooring, or comes from contaminated sources such as sewer backups. Certified restoration experts have the training, equipment, and experience to safely remove water, dry hidden moisture, and prevent secondary damage like mold growth or structural weakening.
Working with a licensed and IICRC-certified restoration company ensures that all steps—from water extraction to drying and sanitization—are completed according to industry standards. Professionals also provide detailed documentation for insurance claims, helping you recover costs more efficiently.
Many restoration companies offer 24/7 rapid response services, meaning help can arrive quickly when every hour counts. Acting fast with professional support minimizes damage, saves money, and restores your home safely and efficiently.
Common Mistakes to Avoid After Water Damage
When dealing with water damage, even small errors can lead to bigger problems, higher costs, and long-term issues. Here are the most common mistakes homeowners make—and how to avoid them:
1. Waiting Too Long to Act
Delaying action allows water to seep deeper into floors, walls, and structural materials, increasing the risk of mold growth and permanent damage. Acting immediately, even before professional help arrives, can significantly reduce restoration costs.
2. Ignoring Hidden Moisture
Water often infiltrates areas you can’t see, such as behind walls, under flooring, or inside cabinets. Failing to address hidden moisture can lead to mold infestations and structural deterioration over time. Use moisture meters, thermal imaging, or professional inspections to uncover hidden water.
3. Using Improper Drying Methods
Relying solely on household fans, heaters, or towels may not remove all the moisture. Improper drying can leave damp spots that encourage mold growth. High-powered dehumidifiers, air movers, and professional drying equipment ensure that your property is thoroughly and safely dried.
Avoiding these mistakes ensures that water damage is properly managed, reducing health risks, protecting your property, and saving you money on costly repairs.
When to Call Your Insurance Company
Contacting your insurance company promptly after water damage is an important step to ensure you receive proper coverage and support for repairs. File a claim as soon as possible once you’ve assessed the situation and documented the damage. Waiting too long can delay processing and, in some cases, affect coverage eligibility.
Be prepared to provide detailed information about the incident, including the cause of the water damage, affected areas, and any immediate actions you took to mitigate further damage. Include photos, videos, and an inventory of damaged items to strengthen your claim.
Professional restoration services also help by providing comprehensive documentation of the damage and repairs, which your insurance company may require. This ensures a smoother claims process and can maximize your reimbursement for both water mitigation and reconstruction services.
Conclusion
Water damage can escalate quickly, causing hidden structural issues, mold growth, and costly repairs if not addressed immediately. Acting fast not only protects your home or business but also safeguards your family’s health and your property’s value.
Even small leaks or minor flooding should never be ignored—the sooner you respond, the less damage you’ll face. While some initial steps can be handled on your own, professional water damage restoration experts have the tools, experience, and certifications to fully restore your property safely and efficiently.
Don’t wait—take action now. Contact a licensed restoration professional to assess the damage and begin the recovery process before it worsens.